Choosing the Right Fixture Style and Material for Your Garage
Great outdoor garage lights do more than keep a driveway visible after dark; they shape first impressions, boost security, and withstand everyday weather. Start with fixture style. A classic gooseneck or barn-style shade throws a focused pool of light that highlights doors and hardware while minimizing glare. Sleek sconces on either side of the garage create a welcoming frame, and lantern-inspired designs provide a traditional look that complements brick, wood, or stucco facades. For low-clearance eaves, compact wall sconces and flush mounts keep lines tidy without sacrificing brightness. The key is matching shade size and projection to the architecture so light lands where you need it—on paving, steps, and numbers—without washing out the facade.
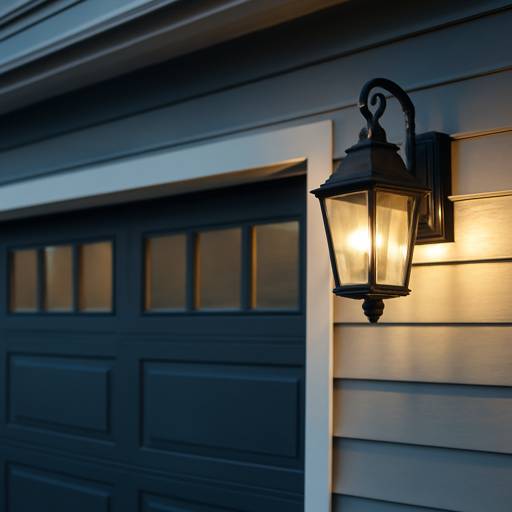
Material choice dictates how long the fixture holds up. Powder-coated steel and galvanized finishes offer robust protection against rain, snow, and sun, and they keep their color longer than basic paint. In coastal areas, corrosion resistance becomes essential; sealed seams, heavy-gauge metal, and durable coatings prevent pitting and peeling. Look for “wet-rated” or “suitable for wet locations” markings to ensure a fixture can handle wind-driven rain. Sealed sockets, gaskets, and sturdy mounting plates help prevent moisture ingress—a common cause of flicker and early failure. Clear, seeded, or frosted glass can all work outdoors, but fully shielded shades or prismatic lenses reduce glare and keep the beam controlled.
Scale matters, too. For a single-car garage, a 10–12 inch shade or compact sconce often feels balanced. For two- and three-car setups, larger shades—14–16 inches—anchor the elevation and improve spread across wider paving. Color plays a role: matte black anchors modern exteriors; white softens farmhouse styling; galvanized steel nods to coastal and industrial looks. Thoughtful details—like hand-finished edges, seamless arms, and clean welds—signal long-term quality. When in doubt, choose pieces made with old-fashioned, hands-on craftsmanship; that human attention to detail translates into fixtures that feel solid, install cleanly, and age gracefully.
When researching styles, browse curated collections of outdoor garage lights to see how different shade diameters, arm lengths, and finishes look against real garages. Photos taken at night are especially helpful, revealing beam shape, brightness, and whether the light spills into neighboring yards or windows. As you compare, prioritize build quality first, then aesthetics—great looks mean little if fixtures need constant replacement.
Brightness, Color, and Control: Getting the Light Right
Once the fixture is chosen, tune the light output. For a single-car door, aim for roughly 800–1,200 lumens per fixture when placed on both sides; for a two-car span, 1,600–2,400 lumens total (split between two or three fixtures) usually covers paving and walkways without harsh hot spots. If mounting a gooseneck over the center of a wide door, a slightly higher lumen target and a broader shade can help distribute light evenly. Balance is the goal: enough illumination to feel safe, but not so much that the facade looks stark or neighbors see glare. A fixture with a well-designed reflector keeps light on task and improves efficiency, so you achieve more usable brightness from fewer watts.
Color temperature shapes mood. A warm 2700K–3000K creates a welcoming glow that flatters natural wood and stone. Neutral 3000K–3500K is popular for modern exteriors, offering clean clarity without straying cold. Higher temperatures (4000K and above) can appear clinical on residential facades and may increase perceived glare. Prioritize a high color rendering index (CRI 90+ when available) so paint tones, plants, and vehicles look true under night lighting. If your fixtures use replaceable bulbs, choose high-quality LEDs with consistent output and a good warranty; if they’re integrated LED, confirm the expected life (often 50,000 hours) and that replacements or service support are available.
Smart control adds convenience and savings. A built-in or add-on dusk-to-dawn photocell lets lights operate automatically from sunset to sunrise, ideal for continuous safety lighting. For targeted security, a motion sensor that triggers a brighter level on approach while maintaining a low standby setting maximizes awareness without wasting energy. Timer functions and smart switches allow custom schedules, vacation modes, and integration with home platforms. When setting sensitivity and hold times, keep wildlife and street traffic in mind to avoid nuisance activations. In dense neighborhoods, dimmable fixtures and precise beam aim are considerate choices, reducing light trespass and skyglow.
For garages that double as workshops or hobby spaces, consider layering: sconces at the doors for curb appeal, plus a task-oriented fixture over a side entry or utility zone. Shielded optics help concentrate brightness where hands and tools are, while softer perimeter light maintains safety. The combination ensures functionality without turning the driveway into a stadium. Above all, treat controls and color as part of design—not afterthoughts. The right settings make well-made fixtures feel even more refined, night after night.
Placement, Installation, and Maintenance for Year-Round Performance
Placement determines how effectively outdoor garage lights perform. For side-mounted sconces, center the backplate roughly 66–72 inches above finished grade, or a few inches above the top trim line, so light washes the door and paving evenly. On multi-door garages, add a center fixture between doors to prevent dark seams. For an over-door gooseneck, mount the canopy about 12–24 inches above the top of the door opening, choosing an arm length that projects the shade far enough forward to cover the driveway apron without creating glare at eye level. When space is tight near property lines, favor fully shielded shades that push light down and forward rather than into a neighbor’s windows.
Plan your wiring path around structure and weather. Use exterior-rated boxes, fittings, and sealant, and ensure all connections are tight and protected against moisture. On masonry, use proper anchors; on siding, use a mounting block or backer to create a flat, sealed surface. If upgrading older fixtures, verify that existing junction boxes are securely fastened and that the circuit is protected as required by local code. For smart controls or photocells, confirm they have a clear “view” of ambient light and are not tucked under deep eaves that can confuse day–night sensing. Where snow and ice build up, install fixtures high enough to remain above drifts and clear of shoveling paths; in extreme heat or sun, finishes with UV-stable powder coat help prevent chalking and fade.
Maintenance keeps performance consistent and protects your investment. Wipe shades and lenses seasonally to remove dust and pollen that sap brightness. Inspect gaskets and screws annually; retighten hardware and reapply exterior-grade sealant where needed. If your fixtures use replaceable bulbs, standardize on quality LEDs with matched color temperature to avoid mismatched tones across doors. For integrated LED units, occasional cleaning and ensuring adequate ventilation around the canopy help preserve lifespan. In coastal climates, a quick fresh-water rinse after storms reduces salt buildup on metal and glass. Small steps add up: a clean lens and properly aimed shade often deliver a bigger perceived brightness boost than simply installing a higher-lumen bulb.
Real-world scenarios illustrate the value of thoughtful design. In snowy regions, families often pair side sconces with a centered gooseneck to light both the driveway edge and the shoveling lane—no more missed patches of ice. In coastal towns, galvanized or powder-coated steel shades with sealed seams outperform thin, uncoated metals that corrode within a season. For hobbyists who work in the garage after dark, a warm 3000K color temperature with high CRI renders tools and finishes accurately while keeping the exterior inviting. In each case, durable construction and attentive installation make the difference. Quality fixtures—built with hands-on methods, strong welds, and careful finishing—look and feel better on day one, and they continue to do their job for years without drifting out of alignment, flickering, or fading.
Finally, think of lighting as part of a holistic exterior plan. Coordinate fixture finishes with door hardware and house numbers. Balance brightness with landscape lights so the driveway, walkway, and entry read as a cohesive path. Use shielding and smart controls to respect neighbors and the night sky. With a little planning and well-crafted fixtures, your garage becomes more than a parking spot—it becomes a polished, secure focal point that welcomes you home every evening.
Casablanca data-journalist embedded in Toronto’s fintech corridor. Leyla deciphers open-banking APIs, Moroccan Andalusian music, and snow-cycling techniques. She DJ-streams gnawa-meets-synthwave sets after deadline sprints.
Leave a Reply